


Oil paintings, with their rich colors and enduring beauty, can grace your walls for generations. Oil paints provide deeper colors and are thicker than acrylic paints. However, these masterpieces require proper care to maintain their vibrancy and prevent damage. Here are 10 essential tips to ensure your oil paintings last a lifetime:
1. Optimal Lighting for Oil Paintings
Direct sunlight is the enemy of oil paints. Ultraviolet (UV) radiation from the sun causes the pigments to fade, discolor, and even crack.
- Avoid Direct Sunlight: Hang your paintings away from windows, especially those facing south or west where they receive the most intense sunlight.
- Consider Artificial Lighting: Opt for low-heat bulbs like LEDs or halogens to minimize heat exposure. Avoid incandescent bulbs, as they produce significant heat that can accelerate the aging process of the paint.
2. Temperature and Humidity Control for Oil Paintings
Extreme temperature fluctuations and high humidity can significantly impact the longevity of your oil paintings.
- Maintain Stable Conditions: Rapid temperature changes can cause the canvas to crack or warp. High humidity can lead to mold growth and encourage the development of mildew on the back of the canvas. Low humidity can cause the paint layers to become brittle and crack. Painting straight onto a white canvas could warp your sense of value.
- Use a Humidifier or Dehumidifier: Maintain a consistent temperature and humidity level in the room, ideally between 40% and 60% relative humidity. This range provides a comfortable environment for both the painting and the people enjoying it.
3. The Importance of Varnishing Oil Paintings
Varnish serves as a protective barrier against dust, dirt, minor scratches, and UV radiation. It can also enhance the appearance of the painting by adding depth and richness to the colors.
- Protect with Varnish: Varnish types include retouching varnish (applied over minor retouches) and final varnish (the final protective layer). If you're using spray varnish, you could stick to two to three layers, or apply anything up to 50 coats if you're after an extra high-gloss effect. Whenever possible, lay the newly varnished work horizontally in a dust-free area to dry so that no runs occur. Do not paint over any varnish layer.
- Professional Varnishing: Varnishing is a delicate process. Consult a professional art conservator or a reputable framer specializing in art conservation for recommendations on varnish type and application techniques. In glazing, a transparent layer of paint – usually made with a single pigment mixed with a glazing medium – is applied over a painting before the varnishing stage.
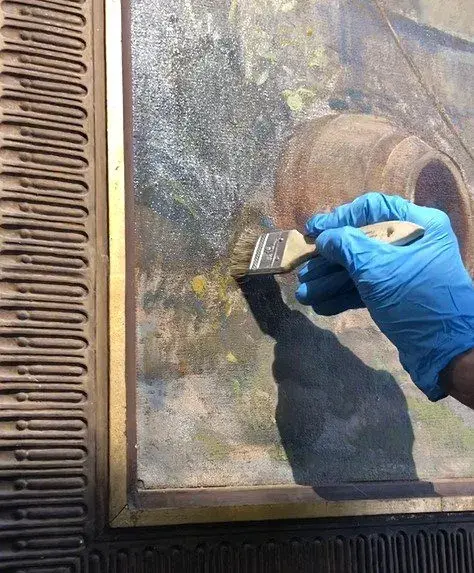
4. How to Clean an Oil Painting Effectively
Dust is a significant contributor to the deterioration of oil paintings.
- Dust Regularly: Gently dust your paintings with a soft, clean brush or microfiber cloth.
- Professional Cleaning: For deeper cleaning, consult a professional art conservator. They possess the expertise and specialized cleaning solutions to safely remove grime, fingerprints, and other accumulated dirt without damaging the delicate paint layers. Extremely thick layers of paint are more prone to cracking due to uneven drying and shrinkage. Glazing is a technique wherein oil paints are applied on top of one another once the previous layer has dried completely. Compared to acrylic painting, there are many rules you must follow to ensure the paint dries properly and you can easily get overwhelmed by all the procedures.
- Avoid DIY Cleaning: Using household cleaners, solvents (like turpentine or mineral spirits), or abrasive cloths can severely damage the paint surface, leading to irreversible discoloration or even paint loss.
5. Gentle Cleaning Techniques for Oil Paintings
- Gentle Touch: When cleaning your oil paintings, always use a gentle touch. Avoid pressing too hard on the surface, which can cause scratches or indentations.
- Avoid Abrasive Materials: Never use harsh chemicals, solvents, or abrasive cloths (like paper towels or sponges). These can strip the varnish, damage the paint layers, and even remove the ground from the canvas. It is best to keep subsequent layers of color as “fat” as possible (thinned with lots of medium) and apply them as finely as possible. In summary, both mediums offer durability, but their longevity may depend on factors like the quality of the materials used, the environmental conditions of display or storage, and the painting techniques employed. The drying time of oil paints affects different aspects of the art process.
- Test Cleaning Solutions: If you must use a cleaning solution, always test it in an inconspicuous area first to ensure it doesn't cause any adverse reactions.
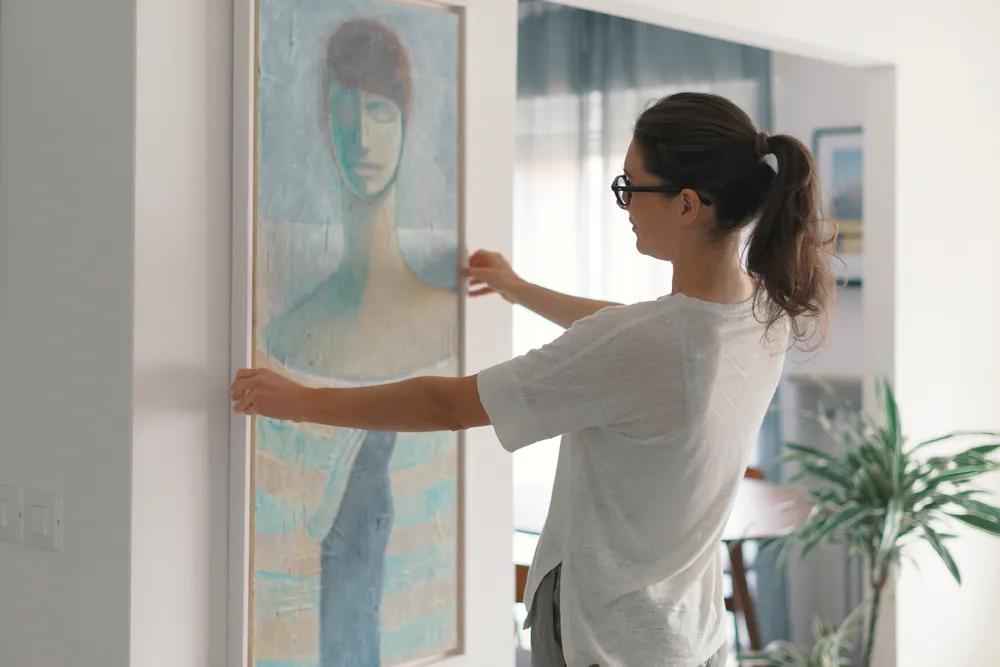
6. Framing and Hanging Your Oil Painting
- Custom Art Frame: Invest in a well-made, custom art frame that provides adequate support and protection. Choose frames made from acid-free materials like archival-quality wood or museum board to prevent damage to the painting from acidic fumes.
- Secure Hanging: Use proper hanging hardware to ensure the finished painting is securely fastened to the wall. Choose hangers that are the correct size and weight capacity for your painting. Ensure the painting hangs level to prevent distortion and uneven wear and tear.
7. Pest Control for Oil Painting Preservation
Insects and rodents can cause significant damage to oil paintings.
- Protect from Pests: Keep your home pest-free by implementing regular pest control measures.
- Store Paintings Properly: When storing paintings, use acid-free tissue paper or archival-quality boxes to protect them from pests.
- Regular Inspections: Regularly inspect your paintings for signs of insect infestation, such as small holes or tunnels in the canvas, discoloration around insect burrows, or the presence of insect eggs or larvae.
8. Handling and Moving Oil Paintings Safely
- Wear Gloves: When handling your paintings, wear clean cotton gloves to avoid transferring oils from your skin, which can leave fingerprints and discolor the painting.
- Support the Back: Always support the back of the painting when moving or transporting it. Avoid lifting by the frame, as this can put undue stress on the hanging wire and cause damage to the painting.
- Use Proper Carrying Devices: For larger paintings, consider using specialized carrying devices like art crates or padded carrying cases.
9. Long Wall Decor Ideas Featuring Oil Paintings
Create a Gallery Wall: Incorporate your oil paintings into a gallery wall for a stunning visual display.
- Experiment with different arrangements: Try creating a symmetrical grid, a flowing asymmetrical layout, or a staggered arrangement.
- Mix and match sizes, shapes, and styles of paintings.
- Consider grouping paintings by oil painters, color palette, subject matter, or historical period to create a cohesive and visually appealing display. Professional artists use both oil and acrylic paints, depending on their specific requirements, the desired outcomes for their work, and personal preferences. Use a limited palette for a more professional look.
Focus on a Single Masterpiece: Dedicate a prominent wall space to showcase a single, large-scale oil painting.
- Create a focal point: Allow a large, impactful painting to become the focal point of a room.
- Utilize architectural elements: Utilize architectural elements like fireplaces, doorways, or large windows to frame and highlight a single masterpiece.
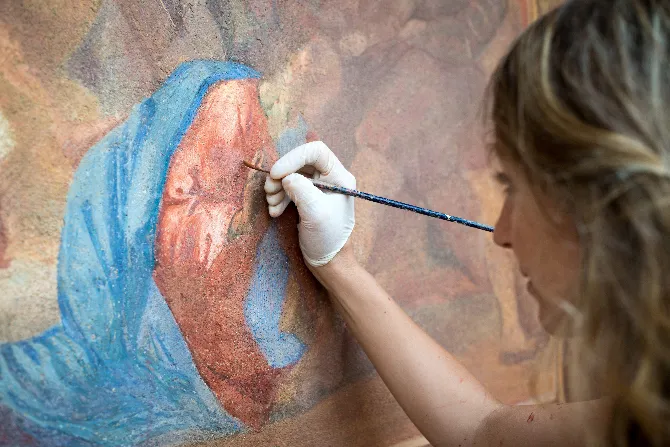
10. Professional Restoration for Damaged Oil Paintings
If your painting sustains any damage, such as tears, cracks, discoloration, or insect damage, consult a professional art conservator for restoration advice. Art conservators possess the expertise to assess the extent of the damage and recommend appropriate restoration techniques, aiming to minimize intervention and preserve the original artwork as much as possible.
Additional Considerations:
- Rotate Paintings: If possible, rotate your paintings periodically to prevent uneven fading from exposure to light.
- Document Condition: Regularly document the condition of your paintings with photographs. This will help track any changes in the painting's condition over time and assist with future conservation efforts.
Remember: Proper care for your oil paintings requires a proactive and mindful approach. By taking the necessary precautions, you can protect these valuable works of art and ensure they continue to bring joy and inspiration for years to come.